How to connect to Extreme Networks Summit X450a-48t
What is it about?
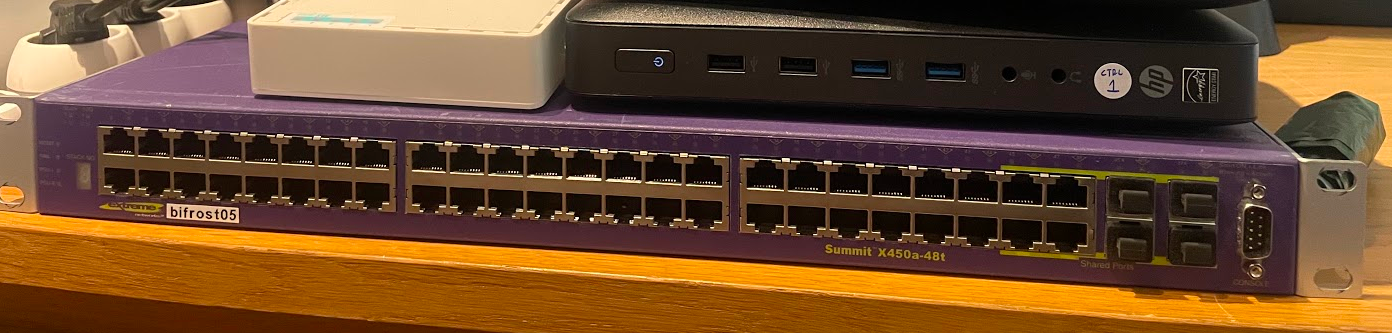
Some time ago I was lucky to buy this Extreme Networks Summit X450a-48t at a very good price (less than a $100). I needed to extend capacity of my internal network way beyond previous setup.
So a friend of mine suggested me this wirespeed hardware, that can also provide L3 support for BGP. It is important, as I use MetalLB on my Kubernetes cluster in BGP mode.
When the switch arrived, it was clear, that I will need to connect to the management console of this switch, as I needed to replace firmware with another one, and reset all configurations to defaults.
Connecting to the switch
Three ways of connecting to management console:
- Using serial/RS-232 port. Needs proper wires / converter.
- Using management port RJ-45 (on the back panel). It needs to be configured however.
- Via SSH - but this also needs to be configured properly and you need to have access credentials.
Connecting using serial/RS-232 port
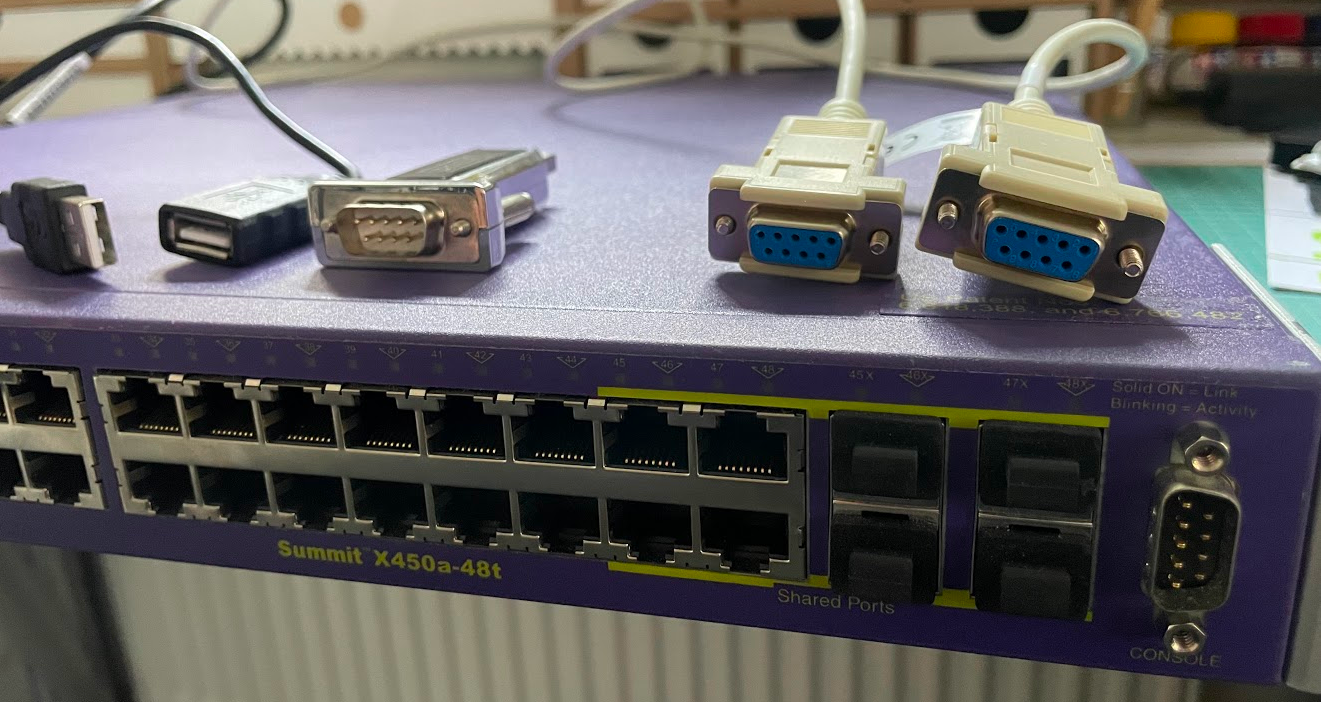
This is the method used when a brand new (or brand used :D) switch arrives at your doorstep. Connecting to this port (which is located on the front panel of this switch) gives you a direct access to the management console.
It was a daunting thing to do actually. I needed a proper RS-232 -> USB converter (actually 3rd worked fine, previous two weren't compatible) and also a proper null-modem cable, that changes order of proper wires (transmit and receive lines are crosslinked). And lastly - the serial connection from your workstation to the switch needs to be configured properly.
All of that is an easy thing when you have brand new switch, with all wirings attached and a setup manual, but in my case it wasn't that easy. But finally I found a working solution.
Wiring
The setup looks like the following:
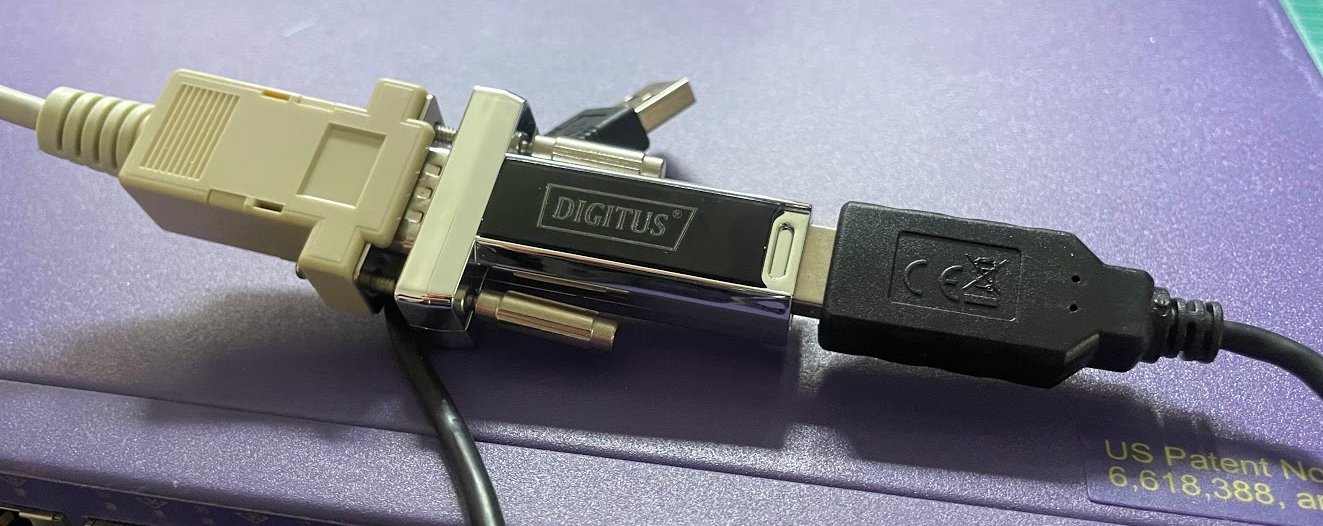
So it is:
- The null modem cable (RS-232, female/female)
- The Digitus RS-232 -> USB converter v1.1. Don't use USBv2.0 version(!)
- (optionally) USBv1.0 extension cord. It is usually shipped w/above Digitus converter. It is not required if you can fit the converter into USB port of your workstation directly.
Now just assembly & attach everything and boot the switch and wait 2-3 minutes (sometimes boot process take a moment).
Serial connection
I tried this on Linux and Windows, and both connection work using same parameters. On Linux I used minicom, on Windows, a basic Putty.
Config options:
- speed / baud rate: 9600 (manual said 115200, but it didn't work for me)
- Data bits: 8
- Stop bits: 1
- Parity: None
- Flow control: XON/XOFF (manual said to use None flow control, but it didn't work for me)
Remember - after turning on the serial connection, the screen will go black. You need to hit enter couple of times to see the actual console.
Resetting switch to zero - configuration
After connecting to the switch, I needed to perform configuration reset.
Normally, there is a CLI command for that (unconfigure switch all), but I
couldn't use it, as I didn't have actuall access to login to the switch (there
was an old system with some old credentials configured).
So the procedure went as following:
- Power cycle the switch, while connected to the serial console
- On the boot prompt, press and hole the spacebar. It will get you to the boot prompt
- At the boot prompt, type command: config none
- Type command: boot to boot switch into zero-config mode.
Using Default image ...

Press and hold the to enter the bootrom...

BootRom > config none
BootRom > boot
Now, after the switch is started with zero-config, login into admin console (login: admin, password is empty, just hit enter). After loggint in, you need to overwrite old configuration with the new one, by using save command:
(pending-AAA) login:

Authentication Service (AAA) on the master node is now available for login.


login: admin
password:

ExtremeXOS
Copyright (C) 1996-2016 Extreme Networks. All rights reserved.

[...]

* Summit # save
The configuration file primary.cfg already exists.
Do you want to save configuration to primary.cfg and overwrite it? (y/N) Yes
Saving configuration on master ......... done!
Configuration saved to primary.cfg successfully.
And everything is done, your brand-almost-new switch is ready!